My top 3 tricks I use in Affinity Designer for every single drawing
I use Affinity Designer almost daily. It's a very powerful tool with a large number of amazing features. Some of which I never use, while others I use all the time. Here are my top three that I use in almost any drawing.
1. Quick Copy & Paste
One of my most frequently used tricks is the rapid object duplication feature. Here's how it works:
Highlight the object(s) that you want to copy
Hold down the ⌘ button (CTRL in Windows)
Click and drag the object
Release the mouse button
You can also make multiple copies by keep holding down the ⌘ button (CTRL in Windows). Simply click and drag the object over and over again. This method is much faster than using the traditional copy and paste approach, either using the laborious way by navigating through the menu (Edit -> Copy/Paste) or even copying with the shortcut for copy and paste (⌘+C and ⌘+V on the Mac or CTRL+C and CTRL+V on Windows).
You can also copy multiple objects with this trick. Highlight everything you want to copy and drag it away while pressing down the ⌘ button.
2. The Versatile Shift Key
The SHIFT key (⇧) is another very valuable modifier in Affinity Designer. It shows up in many different places. In general, it's used to constrain a movement. This comes in really handy to keep all the objects on your canvas neat and tidy.
Movement Constraints
When moving objects with your mouse you can hold down the SHIFT button. This will constrain movement, either horizontally, vertically, or diagonally. Affinity Designer gives you also some visual feedback showing you a yellow line. This works great with when you copy and paste objects as described above. In addition to the ⌘ button, hold also the SHIFT down and you can quickly copy objects all lined up nicely.
Rotational Constraints
In a similar fashion, when you rotate an object by using the rotation handle, when you hold down the SHIFT button, the rotation is constrained to steps of 15 degrees. This is really handy when you want to make sure you rotate the object back to 0 or 90 degrees.
Proportional Transformations
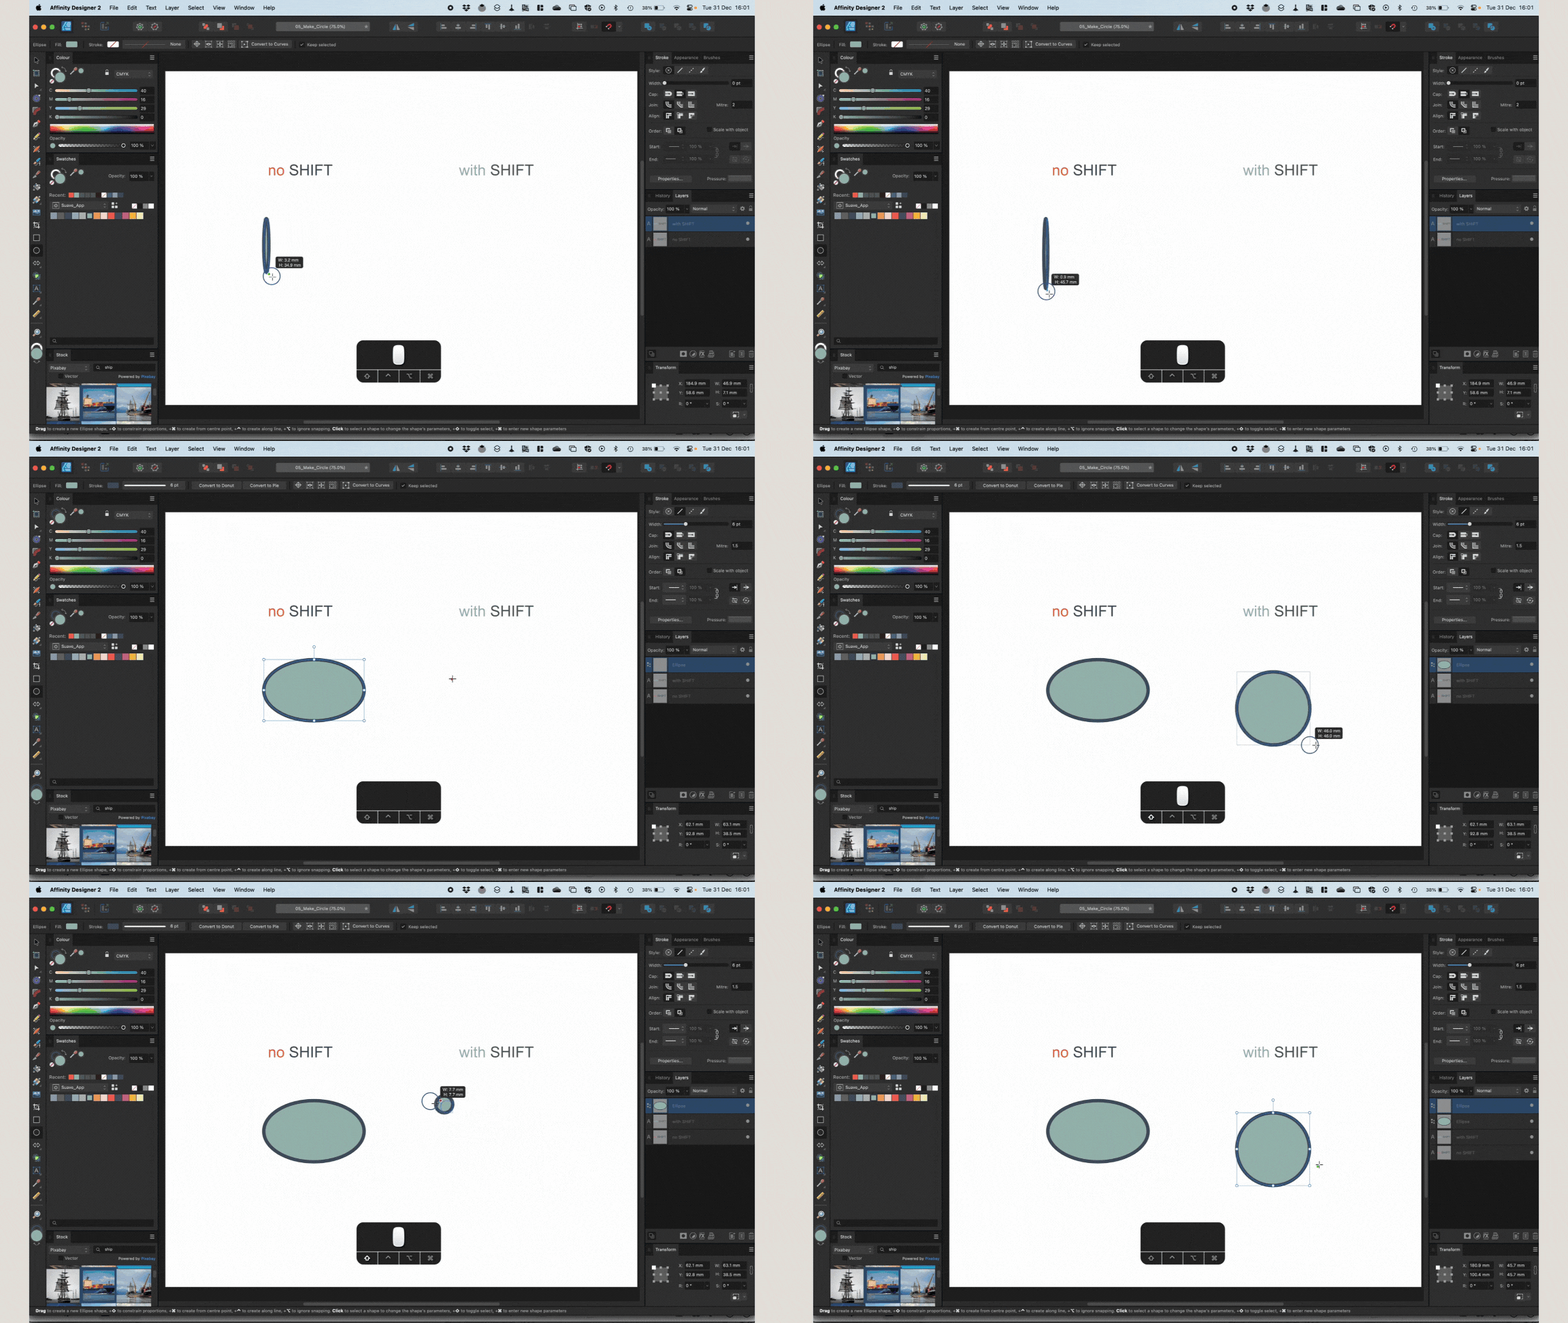
The SHIFT key also constrains the aspect ratio. This is really useful when you want to resize an object without stretching it unwillingly into one direction. However, fixing the aspect ratio can do even more. If you draw new (built-in) shapes (e.g., rectangle, ellipses, star, cogs, ...) and you want to make sure they keep the same height and width, simply hold down the SHIFT button. Instead of a rectangle you will get a perfect square, instead of an ellipse you get a perfect circle. This works for all built-in shapes.
Extra tip: If you also want to keep it growing from the centre of the object (instead of the upper left corner), hold down the ⌘ button (CTRL in Windows) in addition.
3. Masking Made Simple
The final trick I regularly use involves masking. This is a feature in Affinity Designer where you can use any shape to show only a certain part, which is defined by the shape of the mask. This is done by dragging one shape (or a picture) into another (the mask) - see below.
The nice thing is the object that is masked is not destroyed. You can choose it in the layers panel and move it around or even remove it entirely from the mask. You can also have multiple shapes in one mask. Furthermore, you can change the mask at any time as well, e.g., if the mask is made of Bezier curves (e.g., drawn with the Pen Tool) you can change the shape by moving nodes around with the Node Tool or by making new shape using Binary Operations.
I use masking all the time, especially, to draw shadows and to crop pictures.
Creating custom shadows
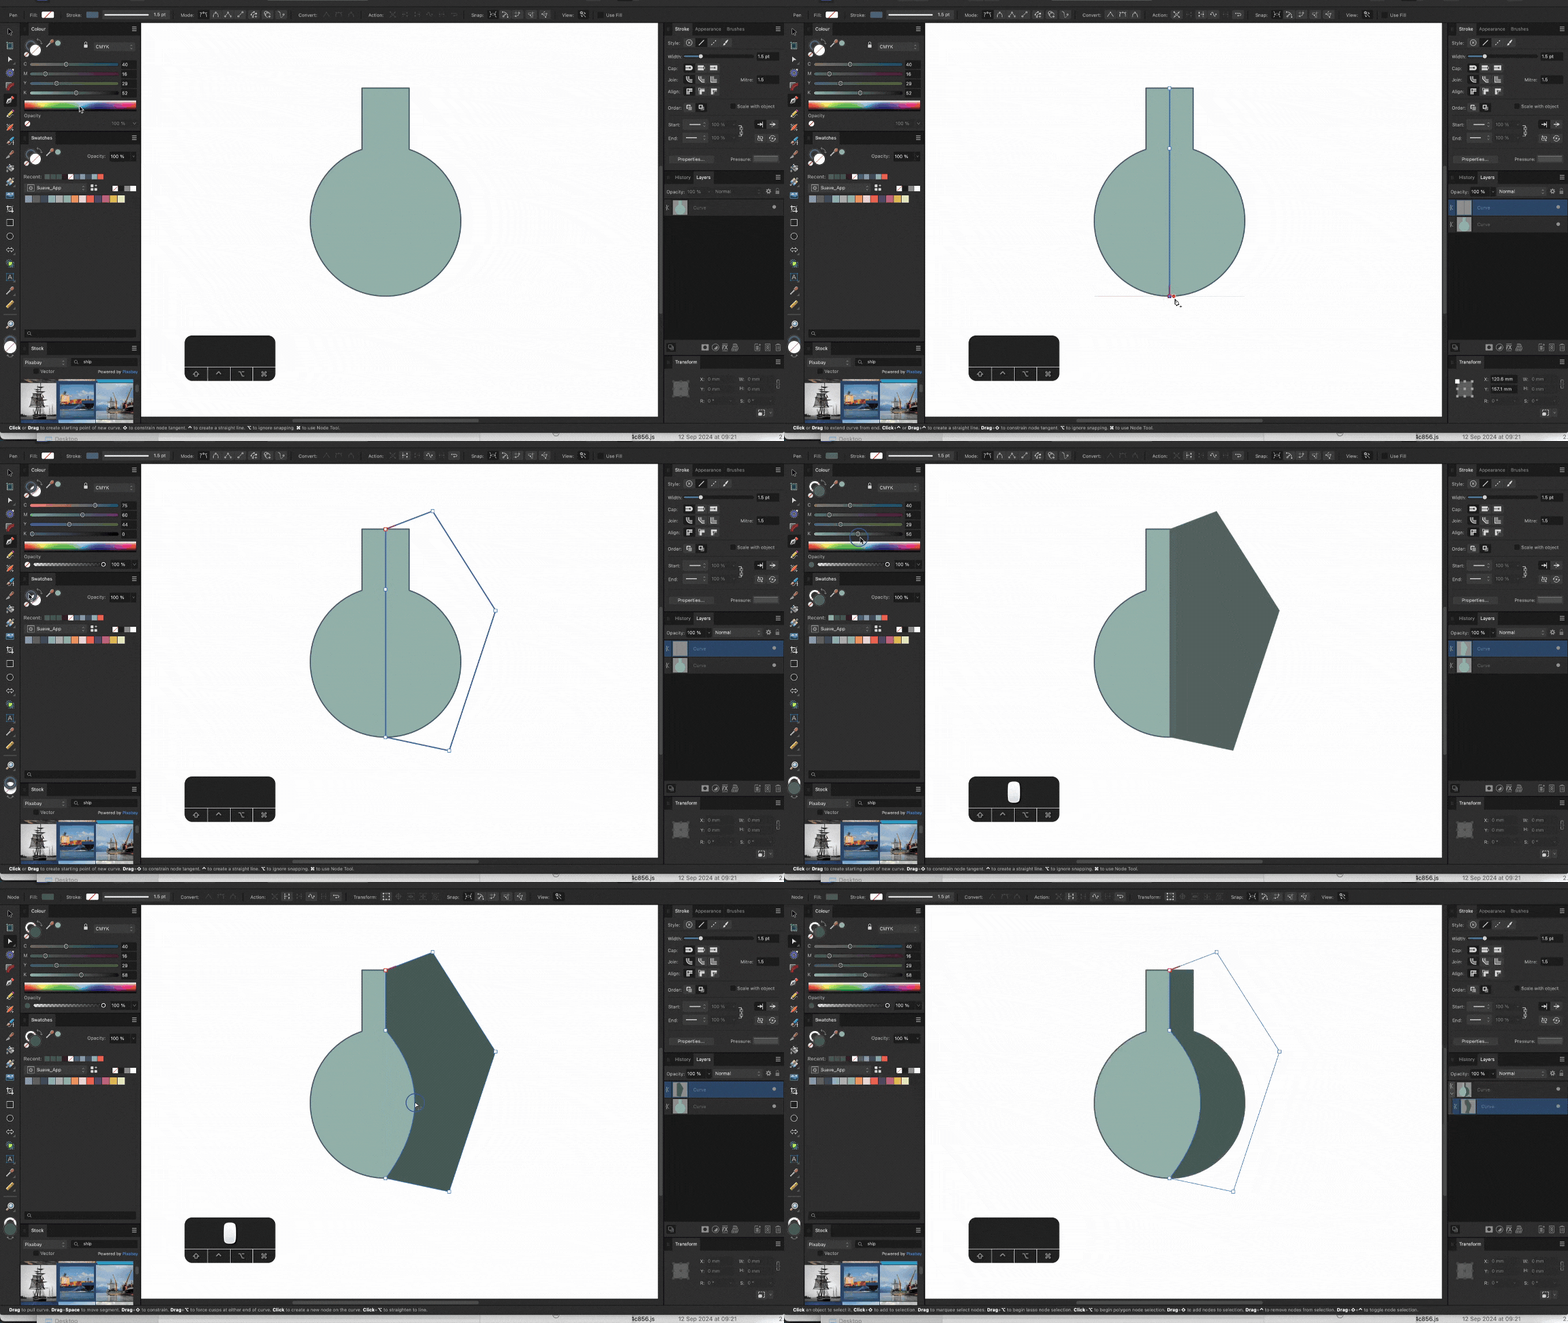
The masking trick is great to draw flat shadows often used in modern icongraphy. You can simply draw a rough shape and drag it into the your original object, which serves as a mask.
You can use the same effect also for gradient like shadow to obtain an effect that looks more three dimensional. I use it to draw simple biological cells (see below). I also made a small PDF to explain the individual steps [link].
Precisely cropping photos
Another very great way to use masking is to crop pictures. You make a shape (e.g., a rectangle) and you drag the picture into it. Again, the process is non-destructive. The picture still exists fully, but only parts are shown. You can select it in the layer panel and move it around and resize it until you are happy.
The mask can have any shape. You can use the Pen Tool, Binary Operations or the Shape Builder Tool to make any shape. Here are some fun examples.
Extra tip: Masking pictures is a great way if you want to make figures for a paper with multiple pictures. Usually, photos coming from different sources have different sizes and aspect ratios. By defining a grid of rectangles of the same size and dragging pictures into them individually you can make all pictures the same size without the need to crop the picture in some other application first.
Other things that might interest you
Here If you want to explore more into this direction here are some useful links:
If you want to learn more about Affinity Designer, check out their great tutorials on the individual tools. They are really well made and they always have great examples.
[Desktop version] | [iPad Version]If you want to learn more about shortcuts in Affinity Designer, here you can download a cheat sheet as PDF
[for the Mac] | [for the iPad] | [for Windows]
As always, please let me know if you find these blog post useful and share anything to help other people in the comment section below!


